Bring your old bike back to life with these pro restoration tips
New bicycles are hard to come by, but your old beater could be ready to ride again.
By Stan Horaczek | Published Jul 7, 2020 7:13 PM EDT
Like so many things during the COVID-19 pandemic, buying a new bicycle is a lot more difficult than usual right now. Local bike shops are having difficulty keeping anything even relatively affordable in stock, while the racks at big department stores remain largely empty. The shortage has wheeled old bikes into the spotlight. That clunker that’s been sitting in your garage for a decade suddenly seems like an appealing way to get out and get some exercise while avoiding the anxiety-inducing ritual of getting on mass transit.
But, resurrecting an old bicycle isn’t as simple as putting some air in the tires and heading out into the streets. With a few simple tools and a little bit of knowledge, you can figure out what your ride needs before it’s ready to cruise. You can also determine if years of sitting around have rendered it unsaveable.
Wash before you look
Layers of dirt from your last ride and dust from time spent in storage can make a bike hard to inspect. “Wash the bike first with basic soap and water to get a clean visual inspection starting from front to back,” says Leo Garcia, head of Shimano’s multi-services program, which sends teams of technicians to bike events all over the world. Once the bike is clean, it will be much simpler to differentiate between dirt and corrosion.
This is also a good time to get your tools together. Garcia recommends at least a pair of screwdrivers (one flat and one Philips), as well as hex keys in the 4mm-6mm range, and an adjustable wrench. You can get a bike multitool to keep in your kit that will likely have most of what you need in one simple package. A set of cheap tire levers will also cost you a few dollars but make changing a tire much simpler.
Start with the frame
The frame literally holds the entire bike together and structural problems with it can lead to catastrophic crashes. With metal frames, rust is the enemy, but not all oxidation requires the same amount of concern. “If the bike has a lot of rust around the welds—and it’s more than just surface rust—then you need a trained eye to determine if it’s safe,” says Garcia. “It’s probably not worth saving.”
To remove surface rust, a simple paste made of vinegar, baking soda, and a small amount of lime juice applied with a brush is a cheap and effective way to do it.
As Garcia points out, different types of metal frames rust differently. “You can leave an aluminum bike in the elements and it will look bad, but it won’t corrode like a steel bike,” he says. “If it’s a kid’s bike that’s not made of chromoly [a common steel alloy frame material] or stainless, the bike will be more susceptible to corrosion.”
If you’re buying or restoring an older high-end bike, you may be working with carbon fiber. It won’t rust like metal, but it can suffer small stress cracks if stored incorrectly. “If it was thrown in a corner and objects were on top of it,” says Garcia, “then it can form stress fractures that are almost impossible to see with the naked eye.” If you’re unsure, have a professional take a look to evaluate it and keep an eye out for cracks.
Why Use an Old Mountain Bike for Touring?
Vintage mountain bikes from the early 80’s to the early 90’s make perfect touring frames for a number of reasons. Most importantly:
- The frames are made of high-quality steel- This material is durable, strong, long-lasting, and easy to repair.
- The frames offer relaxed geometries and long wheelbases- This makes them comfortable for long days in the saddle. The riding position is upright and the long wheelbase makes the bike very stable. Vintage mountain bike frames are surprisingly similar to modern-day touring frames.
- Most old mountain bike frames include braze-ons- This allows you to easily mount racks and panniers as well as fenders.
- They are durable- These old mountain bikes are built to take a beating. The frames and wheels are particularly strong.
- They are cheap- You can find these bikes at thrift stores, garage sales, or on craigslist. You can easily find a decent old mountain bike for less than 100. If you’re lucky, you might snag one that needs a bit of work for 10.
How to Choose a Mountain Bike to Convert into a Touring Bike
It is important to start with a solid bike that’s in decent condition. Because these old mountain bikes are so abundant and inexpensive, it’s not really worth the time or money to buy a beater and completely overhaul it. Look for one that is in good condition.
Before purchasing, the main things to inspect are the frame wheels. The frame is the main reason you’re buying the bike. The wheels are expensive to replace. Wearable parts like tires, the chain, handlebar grips, and cables are less of a concern. In this section, I’ll outline what to look for while shopping for a vintage mountain bike. For more help choosing a bike, check out my guide to buying a used bike.

The Frame
I recommend you look for a bike manufactured between the early 80s to early 90s. You’re looking for a frame with the following characteristics:
- Steel frame- Chromoly 4130 and Reynolds 531 are two of the best steel alloys that were used to build bicycle frames in this era. Both materials are strong, durable, and easy to work with. You can’t go wrong with either. Eliminate any bikes with aluminum frames. Aluminum is more difficult to repair if it breaks while you’re on tour. Steel can be fixed by pretty much any welder anywhere in the world. For more info, check out my guide comparing steel and aluminum frames.
- No suspension-Suspension adds unnecessary weight and complexity to the bike. It’s something else to worry about breaking. A rigid steel fork won’t break. Suspension also makes each pedal stroke less efficient because some of the energy will end up compressing the suspension instead of propelling you forward. If you find the perfect frame but it happens to have a suspension fork, you can swap it out for a rigid steel fork.
- Braze-ons- If you plan to use panniers and racks, make sure the frame and fork have the necessary braze-ons for mounting them. Most old mountain bikes have braze-ons. If you plan to use bikepacking bags, braze-ons aren’t required. For more info on bicycle touring luggage, check out my guides: Bikepacking Bags Vs. Panniers and Trailers Vs. Panniers.
- Your size- For maximum comfort and efficiency, the bike has to fit you. If it’s too small, you might feel cramped. If the frame is too large, you might have trouble controlling the bike. For help, check out this guide to bike sizing from Bicycle Guider. If the size is slightly off, you may be able to make it work by installing a different size stem or handlebars.
- Good condition- Once you find a suitable frame, inspect it for damage or defects. Make sure there are no cracks, dents, or major rust. If there is anything wrong with the frame, keep shopping.
Wheels
Another reason these old mountain bikes make great touring bikes is the wheels. They are durable because they are built to handle off-road use. Look for wheels with the following characteristics:
- 26-inch wheels- Most mountain bikes of this era use 26-inch wheels. These were built before 29ers became popular. The main reason that 26-inch wheels are preferable to 29ers is wheel strength. Smaller diameter wheels have shorter spokes. They can take a greater beating without bending or breaking. 26-inch replacement parts are also generally cheaper and easier to find. For more info on wheel size analysis, check out my guide, 700c Vs. 26 inch Wheels for Touring or watch my YouTube video.
- double-wall rims- These are stronger than single wall. They can handle the extra weight of your gear. For more info, check out my guide to single vs double wall rims.
- 36 spokes- Most bikes use 32 spoke wheels. The 4 extra spokes add a considerable amount of strength to the wheel. This allows you to carry more weight without worrying about breaking spokes. For more info, check out my guide to 32 Vs 36 spoke wheels.
- Cup and cone style hubs- These last pretty much indefinitely if they are maintained. They also allow you to replace parts as they wear instead of replacing the entire hub.
You also want to make sure the wheels are in good condition. After all, wheels are one of the more difficult and expensive parts to replace. First, give the wheels a spin and make sure that they are reasonably true and running smoothly.
The easiest way to check that the wheel is true is to look where the rim touches the brake pads. While the wheel is spinning, you can usually see a wobble or hop. If it is severe, you may want to consider looking for a different bike. A minor wobble will be expected for an old bike and is fine.
Next, each spoke to ensure that none are broken or loose. To do this, just wiggle them back and forth with your finger. If you find a loose one, make sure that it’s not pulling out of the rim. At this time, you should also inspect the rim for cracks. You need to replace cracked rims.
Converting Your Old Mountain Bike into a Touring Bike
After selecting a bike, You’ll want to make a few upgrades to make it more comfortable for touring. A few changes you may want to make include:
- Install road tires. Old mountain bikes usually come with 2.5 inch wide knobby tires. These work fine off-road but just slow you down on road. Swap these out for some touring tires to increase efficiency and reduce the likelihood of flats. One of the most popular options is the Schwalbe Marathon HS Wire Bead Tire. They come in widths ranging from 1.25 inch to 2 inch. I have 26X1.5 tires on my bike.
- Swap out the handlebars or install bar-ends. Mountain bikes usually come with flat bars. The problem with these is that they only offer one hand position. While touring, it’s useful to have a second hand position. This improves comfort during long rides. The simple solution is to install some bar ends like the Profile Designs Boxer Bar Ends. Alternatively, you could install different handlebars. Trekking bars are a popular option.
- Install fenders. These help to keep you, your bike, and your gear clean while cycling on wet roads. They can also increase the life of your drivetrain by keeping it cleaner.
- Install racks. The easiest and least expensive way to haul your gear is with a rack and pannier setup. I like the Ibera Bike Rack. It’s well made, affordable, and works with a large variety of bikes.
- Upgrade the saddle. Because you’ll be spending so much time in the saddle while touring, you might want to replace it with a more comfortable option. Leather saddles are popular for touring. I like the Brooks B17 Standard Saddle. You can read my review of here.
- Install a mirror. This is a great safety item to have for touring. It’s comforting being able to see cars approach as they pass. I like the Mirrycle MTB Bar End Mirror. You can read my full review here. For more info on mirrors, check out my complete guide to cycling mirrors.
- Add lights. Even if don’t plan to ride at night, you’ll still want to have lights. They are necessary for safety.
- Add water bottle cages. You’ll drink a lot of water while touring. The more you are able to carry, the better.
- Install platform or clipless pedals. To improve efficiency, you may want to swap your pedals out for clipless. You could also install large platform pedals for more comfort if you prefer them. To help you decide, check out my flat pedal vs clipless guide.
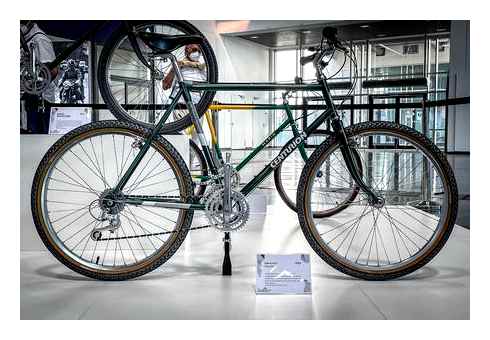
1991 Marin Restomod #restoration #90s #retro #mountainbike #cycling #bike #restomod #witney #bikes
Of course, you could tour on your bike as-is. The above parts will just make your bike a bit more comfortable and efficient for long-distance rides.

Repairs and Maintenance That You May Need to Make Before You’re Ready to Tour
Most of these old mountain bikes are pretty bombproof. With a bit of bicycle mechanical knowledge, a few basic tools, and a few hours of your time, you should be able to get your old mountain bike riding like new. Here’s what I recommend you do before setting out on tour:
Step 1: Clean the Bike
Once you purchase your bike, you will want to give it a good cleaning before starting any repairs. When everything is clean, you’ll be able to more easily determine what needs to be done as far as maintenance and repairs.
Step 2: Grease the Bearings
Because we most likely don’t know the history of the bike and we are going to be putting a lot of miles on it, I recommend you at least grease the hubs. You may also want to check for play in the bottom bracket and grease it or replace it if necessary. Check the headset and grease it as well if necessary.
Step 3: Inspect and Replace Wearable Parts
Next, you’ll want to inspect the chain and cassette. If there is excessive wear, replace them. If not, thoroughly clean and oil the chain.

You’ll then want to inspect and test all cables to make sure that they are running smoothly. Adjust the derailleurs and brakes. While adjusting the brakes, inspect the pads and replace them if they are worn.
Step 4: Inspect the Tires and Tubes
Finally, you’ll want to take a look at the tires and tubes. If the sidewalls are cracked or the tread is worn low, you’ll want to replace them. If the tubes look old and have a bunch of patches already, you may want to consider replacing them.
For tires, I recommend Schwalbe Marathon Plus Touring Tires. They are known as the best touring tires. The reason they are so popular is that they are incredibly durable and offer excellent puncture protection. I have heard of people touring for thousands of miles on them without a flat.
Sort the bearings
Investing time sorting out the bearings first which give you a much smoother ride
Nothing ruins the feel of a ride like crunchy bearings, so do yourself a favour and get them running smoothly again.
Things have moved on a lot from the days when square taper bottom brackets were the gold standard, but they have a lot to offer still in my eyes. They’re sturdy, simple, and the cranksets can be reinstalled countless times. However, loose bearings packed with grease are never going to beat a sealed cartridge unit (unless you’re on the track, free from the worries of grit ingress).
Likewise, replacing the headset with a sealed cartridge unit (the Tange Falcon is my go-to) will smooth out the steering action, and drastically reduce the risk of pitting the headset cups over rough ground, resulting in that awful notched headset feeling.
Unless you replace the hubs you will be stuck with either loose or caged ball bearings, but all is not lost. A deep clean and regrease will usually have them running smoothly once more (this job can be relatively fiddly, so don’t get disheartened if you give up and take it to a friendly local bike shop).
How to Restomod a Bike : Marin Mountain Bike Restoration
New cables and housing
It’s well worth switching out your outers as well as inners when it comes to replacing cables throughout
Old thumb shifters and brake levers are about as indestructible as bike parts come, but they’re useless if the cables and housing protruding from them are corroded and sticky. Best bet is to replace them unless they’re clearly in good condition. It’s cheap, it’s unglamorous, nobody else will notice, but it can make a huge difference.
Yikes! Replace the cables for smooth running
Improve the braking
Give your old rim brakes some TLC and they might just surprise you
Odds are the bike you’re working on will have cantilever brakes, or V-Brakes if it’s more modern. While discs have clear advantages over rim brakes, with a bit of effort you can improve the performance of the system you already have with a few little tweaks.
Firstly, clean the brake track. Big scrubby wipes are a good start, but the best thing is some paper towel and surgical spirit or bioethanol. Brake pads work best on bare metal, not on years of accumulated brake dust.
Secondly, swap the pads for something decent. Basic brake pads are always tempting as they’re cheap, but they’ll wear out faster and you simply won’t stop you as quickly. A premium set of pads (my choice is always Kool-Stop Salmon), properly adjusted with some toe-in, will have you re-thinking whether cantis are so bad after all.
Swap the tyres
Fresh rubber will make a huge difference, although your options may be a bit limited at 26″
A lot of vintage tyres will be under 2” in width, but in my experience you can often fit up to 2.25” rubber on these older bikes. While it may not always be the best option to go as wide as possible, it’ll certainly improve the comfort.
Very few companies are making new 26” bikes, and so tyre choice is a little limited, but that’s not to say you can’t get some very good tyres. WTB Nanos for example are an excellent do-it-all choice available in 26”, as well as options from the world of dirt jumping such as Schwalbe’s Billy Bonkers or Table Top.
There are even a handful of companies making new 26” rubber precisely because of the number of people repurposing old bikes; Ultradynamico are set to release a new set for smaller wheels this year, while Rene Herse have four of their most popular treads also available in 26” for ultimate supple points.
How do you go about sourcing the bikes and parts for your builds?
Sourcing the bikes is down to being obsessive on Ebay, Marketplace and word of mouth.
As my profile has gained popularity I’ve been getting some pretty juicy leads. I’m still waiting for Marin to give me a project though!
What are some of the biggest challenges you face in restoring bikes?
My biggest issue is time. I run a tree surgery business which combined with family life means my time to restore is limited.
My method is to have multiple bikes on the go and gradually piece them together and allow them to inspire one another. There are generally hundreds of parts flying around. Some fit, some don’t, but they always find a home and that also dictates whether a build remains original or custom
Do you ride modern MTBs as well? How do the older bikes compare?
I was fanatical about mountain biking in the nineties and then it just dropped off the map for me. It wasn’t until that day out running when I thought about it again.
So in a weird way, I’ve only ever known 90s mountain bikes. However, I am pretty good at telling the difference between every Marin from 1988 to 1996 now!
Rear derailleur hanger
Some old frames have no rear derailleur hanger, or they do, but it’s damaged beyond straightening and repair.
If you wish to install a more modern direct-mount rear derailleur on a frame without a hanger, you’ll need a rear derailleur hanger adapter:
Conclusion – is it worth restoring an old bicycle?
Old frames can be re-used to make great bicycles. Both for commuting, and for recreation. And no, you don’t need a mountain bicycle to go riding in the woods, in spite of what marketing experts are saying.
For the ease of maintenance, it’s simpler if you adjust the frame so you can use the currently available components (rear hubs, bottom brackets etc.). Of course, there’s no reason to throw away any old parts while they are still working. Just make sure, if you are investing some time and money, that you have a platform that can be maintained in the long run (so you don’t have to “retire” the bike once its bottom bracket bearings wear out, for example).
In my opinion and experience, steel frames with British standard bottom bracket threads are a perfect candidate for easy restoration, with minimal modifications.
For bikes with sentimental value, don’t let any of the above-noted problems stop you! As it is nicely shown in the Story of one bicycle, and 40 years.
Video demonstration of this story
10 thoughts on “Vintage bicycle frames with modern parts”
i ride a cromemoly steel bicycle made in 1992,trek racer.this bike never lets me down and i like the fact its very easy to customise and repair when things do wear out,another reason i like the older bikes is they look nicer when rebuilt,they are also made for taller or shorter riders.these bikes are basically fail proof.they are abit heavier than a modern racer but not by alot if you rebuild them with some modern parts and wheels.i wish they still made these bikes brand new as i would buy six more.they are getting harder to find now,especially one that has been looked after. Reply
its sad to see the way the bicycle industry is now going,very expensive bicycles that are just too hard too expensive to fix,carbon fibre bikes are fine for race day but for the average rider they are a poor choice,bicycles were allways meant to be a cheap form of transport and they were allways built so the average person could fix them thats why we bought bikes in the first place,modern bikes dont even fit taller riders,some companies are now making retro style bikes with chromemoly frames but they are rare,i think the bike industry is going down the wrong path,they made chromemoly frames for many years as that system worked very well and it was a fail proof system and you could buy any size bicycle. Reply
Exactly my thoughts, Mike! I’ve gathered near ten old bikes from mostly 80’s and 90’s, some of them later too, but quite basic and simple in their category, nothing too fancy or fragile. They’re are quite maintainable still, some issues here and there, but very little critical ones. I’ve talked with some bike repair people, or more likely fantasized about a “standard bike”, instead of these modern increasingly disposable ones. Frames could be of many shapes and sizes but the critical components would be of old and proven standards that every “standard bike” would share, be it headset, bottom bracket spindle, drop outs, wheels, hubs, axles, brake mounts on the frames, seat post diameter, etc, etc, so that there wouldn’t be any problems in getting those parts and mixing and matching them to your like and make the bike go as great as new for years and years to come. But is there business in it is another question. Bicycle industry is more and more and honestly has for decades been one “the latest hype” driven industry that is in constant vicious cycle (pun intended) of re-inventing the wheel to make the sales soar each year over and over again. I wish there were courageous entrepreneurs that would defy the bicycle industry trends and settle to making a truly “honest” bike, no tricks in order to build proprietary and exclusive non-standard components and other solutions to undermine any competition and consumers rights (think about the derailleur hanger mess for one example, this day and age will leave behind a trail of bicycle frames good only for single speed or internal gear hubs if even that, because of the constant flow of hub width/axle standards). Bicycles should be made for long lifespans, even decades long, if not even century, because the frame, if properly made won’t wear that bad, but the moving parts will and they only need replacement in most cases. That’s my two cents on the topic anyway.
If the worst should happen and the BB-shell threads are stripped from a vintage steel frame, is there any known cure that would actually work in this case? Our LBS’s don’t do metal work so much, they can do light tapping for the threads to clean them, but can’t reverse any damage by much serious means. I got a repair BB from one of the shops, but it lasted less than 50km before the left side cup would cut into two pieces, just like that. The frame is a mid 80’s Peugeot of 103 Carbolite tubes (comfortably with French metric 35x1mm thread and a noob didn’t know how to detect such an old oddity, even got some helping hand from a strong young man who would ram a steel bottom bracket of ISO standard 34,8×1,06mm thread into that BB-shell. The JIS BB would seem ok there for quite a while, thousands of kilometers even, until the crossed thread would start giving up making tightening the BB not very reliable. To summarize the question, is there any possible way that doesn’t involve major metal works, like replacing the BB-shell altogether or boring the existing one and sleeving it for all new threads, something that would actually work to get the BB-shell fixed and BB stay? Or am I watching a nice piece of scrap metal in that beautiful frame? Any know cases where stripped BB-shell threads frame has resurrected into its new glory without rebuilding the whole frame? I know chances are slim by what information I’ve found in internet, but if anybody could even confirm that all repair bottom brackets are waste of time and money or if chemical metal (aka metal particles enhanced epoxy) could be threaded with some odds to make it work for at least sometime in order to have time to find a replacement frame. Fortunately it’s not my only bike, but very dear to me, like said and would deserve plenty of more fun and enjoyable kilometers. Reply