How To Build Your Own Bike- A Detailed Guide
We buy and receive free products to review, and may receive commissions from affiliate links. See our disclosure page for details.
So in this article, I want to begin with the “how” part. If you have read any of my other articles you will know that I truly believe the bike is a utilitarian machine. It is easy to work on, fun to customize, and even more, fun to ride around.
Sure there are plenty of carbon fiber and graphene compound frames out there that cost more than your first born but you shouldn’t let that intimidate you.
How To Build Your Own Bike- Steps
The idea of building your own bike is surely exciting, but speaking from experience, you should definitely get the right tools first. You don’t want to be fumbling with the frame and tires not knowing how to fix them together. Here is what you are going to need:
Tools
- Allen Wrench
- Screwdrivers
- Torque Wrench
- Adjustable Wrench
- Spoke Wrench
- Chain Tool
- Bottom Bracket
- Pedal Wrench
- Cable Cutters
- Grease and Lubricants
- Chain Whip and Cassette Lockring Tool
Don’t be scared of the long list. These tools are only going to make the job simpler! Let’s begin.
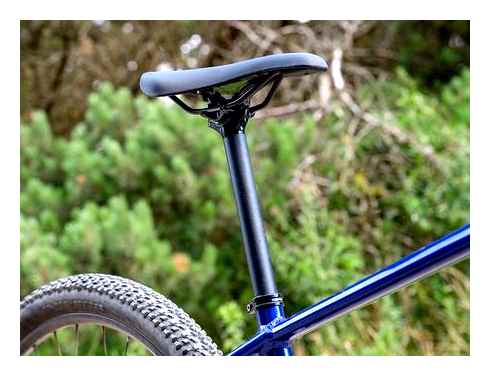
Step 1: Get The Frame
Unless you know how to weld and have all the necessary jigs for bike building; the frame is something you will have to buy either new or used. Sometimes the classifieds or your local co-op are good places to start looking for frames.
You need to make a choice on what kind of bike you want to build and buy accordingly. You should look for something your size of course and judging against the past bikes you’ve owned this should be relatively easy.
Besides the size, you want to make sure the frame is not bent, rusted, or broken in any way. When dealing with steel, bending is more likely to be the case, but even then still unlikely. Aluminum and carbon fiber tend to have more catastrophic failures and will be easy to see with the naked eye.
If you can, try to make the bottom bracket threads have not been stripped or damaged as well. This kind of thing can be fixed but it will add unnecessary cost to the project. Many times used bikes will come with a myriad of parts still attached to the frame.
Tip: I would recommend you buy a frame new is the only way to ensure that it has not crashed. For aluminum and carbon frames it is the only way to really know the mileage and age of the bike. Most manufacturers have a frame or frame and fork option on their website store.
Step 2: Find The Fork
Just like with the frame you need to know what kind of fork you want. It should match the type of bike be it road, BMX, mountain, or everything in between. You should know what material is best for how you want to ride and it needs to have the right clearance for the types of tires you want.
Some manufacturers are now doing offset or tapered headsets in which the top race (headtube race) is smaller in outside diameter than the bottom race (crown race). It is critical that you find a fork that is compatible.

In choosing your fork think about the frame material. Carbon fiber is light and strong. It will dampen the hardness of the road beneath you. Aluminum is light and rigid. It can sometimes amplify those bumps in the road but it is cheaper than carbon fiber and most mid to upper-level road bikes are made out of aluminum.
Steel is heavier and suppler than the other two. It is cheaper as well. This is my go-to material for my mountain bike fork. It’s best for touring, fat tire mountain bikes, and family heirloom road bikes. It is going to outlast you.
Tip: If you need rack or fender mounts, you can get them. If you want to run a quill stem make sure you get a threaded fork and headset.
Step 3: The Headset
Briefly mentioned before, the headset is a set of bearings, cups, and races that connects the fork to the frame. It is what allows your front wheel to turn. The races are pressed down onto the fork, the cups are placed into the holes in the headtube on the frame, and bearings fit into these cups.
Most modern headset bearings are sealed bearings. They are also usually higher quality than unsealed bearings.
Sealed means that the bearing inners and outers are press-fitted around the bearing balls themselves and usually a rubber or plastic seal is placed on top of the bearing balls so you cannot see them when you look at the finished product. The only drawback here is that sealed bearings are much harder to work on and add grease to the life of the headset.
Bearings that are not sealed tend to last a little longer because you can clean and regrease them after every season. My favorite headset brands include Chris King, Phil Woods, Paul Components, and Cane Creek.
Tip: Be sure to keep in mind that if you get a tapered headtube you get a headset that is compatible.
Step 4: The Stem
Sizing and compatibility are also very important here. You need to get a stem that will fit around your steer tube. Modern stems fit down over the steer tube and tighten into place. Often times there will be spacers to raise the height of the stem. The spacers go on top of the headset and then the stem fits down over them.
Why Should You Build Your Own Bike?
So after all that why would you build your own bike? It is the only way to have complete control of what goes on your bike. Sure, you can add new parts to an already complete bike but you won’t learn as much.
Building a bike will increase your knowledge of the industry, it will increase your knowledge of the mechanics of bicycles, and increase your confidence in yourself. I have done it. It took time and effort, and it was not cheaper than buying a complete bike but it changed the way I think about transportation and it made me want to become a mechanic which I am today.
Here is a beginner guide that might help you a lot through the building process
Carbon vs Aluminum Bike
The difference between carbon and aluminum bike is evident in their looks and how they perform. Carbon bikes are usually lighter and more comfortable to ride, while aluminum bikes are known for being more durable.
However, both materials have their own advantages and disadvantages that need to be considered before choosing one over the other.
Carbon Fiber:
-Lighter weight than aluminum, making it easier to pedal and climb hills
-Higher in price than aluminum
-Frames made from carbon fiber can be more fragile and are more difficult to repair if damaged
-Heavier than carbon fiber, making it more difficult to pedal and climb hills
-Less price than carbon fiber
-Frames made from aluminum are more durable and easier to repair if damaged

Carbon vs Aluminum Mountain Bike
For mountain bike riders, the choice between carbon and aluminum is one that often comes down to personal preference. However, there are some key differences between the two materials that can help riders make a decision.
Carbon is a strong and lightweight material that is often used in high-end mountain bikes. It is very stiff, which makes it great for aggressive riding and racing.
As, Carbon is lighter weight, making it easier to maneuver your bike on rough terrain. It also has some vibration-damping properties, so it can make for a smoother ride.
However, if it cracks, it can be difficult to repair and will be more costly.
Aluminum is a more affordable option that is often used in entry-level and mid-range mountain bikes. It is not as stiff as carbon, but it is still strong and lightweight.
As, aluminum tends to be stiffer, making for a rougher ride. Aluminum frames may not last as long as carbon frames, but they are a great option for budget-conscious riders.
However, they’re also easier to repair if they’re damaged.
Carbon vs Aluminum Bike Frame
When it comes to bike frames, there are two main materials that you will see, carbon and aluminum. Both of these materials have their own set of advantages and disadvantages, so it is important to understand each one before making a decision about which frame material is right for you.
Carbon frames are often seen as the gold standard in the bike world. They are incredibly lightweight, which means that they will not weigh you down on long rides.
Carbon frames are also very stiff, which provides a smooth ride. However, carbon frames are also very expensive and can be difficult to work with if you are not experienced in frame building.
Aluminum frames are a great alternative to carbon frames. They are much more affordable, while still providing a lightweight and stiff ride.
Aluminum is also much easier to work with, which means that it is a great option for beginner frame builders. However, aluminum frames do not have the same strength-to-weight ratio as carbon frames, so they are not as light.
Carbon vs Aluminum Bike Weight
When it comes to weight, carbon is the clear winner. A carbon frame can be up to 60% lighter than an aluminum frame of the same size. This makes a big difference when it comes to climbing hills or accelerating.
Here’s a look at the average weights of both types of bikes:
Carbon is also much more comfortable to ride, absorbing vibrations and road bumps that would otherwise be felt by the rider.
Aluminum bikes are not as light as carbon bikes, but they are typically more durable. This is due to the fact that aluminum is a much stronger material.
As a result, aluminum bikes can be ridden on rougher terrain without as much worry about damaging the frame.

Carbon vs Aluminum Bike Price
The cost of carbon and aluminum bike frames is also a consideration. Carbon frames are usually more expensive than aluminum frames, but this difference in price has been decreasing in recent years.
Carbon fiber bikes are typically lighter and stiffer than aluminum bikes. Carbon fiber frames can also be molded into complex shapes, which allows for more advanced frame designs.
Aluminum bikes are usually less expensive than carbon fiber bikes, but they are also typically heavier and not as stiff. However, aluminum frames can be made into very complex shapes, which can give them an advantage in terms of aerodynamics.
Carbon vs Aluminum Bike Damping
Carbon frames are often praised for their smooth ride quality. This is because carbon is very good at absorbing vibrations from the road.
Carbon frames can also be designed to be very stiff, which is great for power transfer when pedaling.
Aluminum frames are often cheaper than carbon frames. They are also typically stiffer, which some riders prefer.
However, aluminum frames can transmit more road vibrations to the rider. This can make for rougher ride quality.
Carbon Bike Pros
Carbon bikes are incredibly light, which means they’re easy to ride and accelerate.
They’re also extremely stiff, so you’ll get more power transfer when you’re pedaling hard.
Carbon bikes tend to have a smooth ride quality, thanks to the material’s natural vibration-damping properties.
Carbon Bike Cons:
Carbon bikes can be quite costly, so you’ll need to make sure you’re getting value for money.
They’re also quite fragile, so you’ll need to take extra care of your carbon bike to prevent damage.
Carbon bikes can produce a lot of road noise, so you might want to consider other materials if you’re looking for a quiet ride.
Aluminum Bike Pros:
-Lighter weight than other bikes
-Stiff frame provides an efficient pedaling platform
Why Are Carbon Bikes Responsive?
There are a few reasons why carbon bikes tend to be more responsive than their aluminum counterparts.
First, carbon is generally lighter than aluminum, so it requires less energy to get up to speed.
Second, carbon is stiffer than aluminum, so it transfers power more efficiently from the pedals to the wheels.
Finally, carbon absorbs vibrations better than aluminum, so it provides a smoother, more comfortable ride.
In short, carbon bikes are generally lighter, stiffer, and more comfortable than aluminum bikes, making them ideal for racing and other high-performance applications.
Designing a Carbon Fiber Bike
When I am not installing Markforged printers or teaching customers SOLIDWORKS, I do long distance charity rides. These are often 50, 75, or 100 miles in 1 or 2 days. In order to ride these distances, I need to have a bike that’s both comfortable and fast. My ride of choice is a short wheel base recumbent, the Vision R40. The short wheel base fits my frame better than a road bike and gives me an added layer of comfort during the long ride. However, increased comfort means increased weight. The R40 weighs 32 points, more than twice as much as a light road bike would. One of my favorite rides of the season is the Three Notch Century. Unfortunately the weight of the chromoly frame for my Vision R40 is less than ideal for the hill climbs through the New Hampshire White Mountains. A lighter bike could make a huge difference on these long, hilly rides.
A Homemade Carbon Fiber Bike
With the strong parts that Markforged printers can create, I realized that I could create a much lighter bike affordably. A complete replacement frame and seat assembly made of 3D printed components bonded between cut sections of carbon fiber tubing is a strong, manufacturable, and affordable frame. There are just 10 unique Onyx printed components in the final assembly and 7 different sections of pre-made, bicycle frame sized, carbon fiber tubing. Some parts and tubes are used in 2 – 4 different instances within the overall assembly. The front fork, stem, and handle bars have already been purchased from eBay in carbon composite. Material costs run at about 900, which more than a 1000 cheaper than a custom built composite frame. Couple that the ability to customize the design for myself, and you have a winning formula for a carbon fiber bike.
The First Part
Designing a composite bike frame is one thing; proving that it’ll be lighter and strong enough is a completely different story. In order to validate my design, I printed the first element of the new frame: a left rear dropout. This part holds the rear wheel in place, so it needs to be incredibly stiff. I designed it in Solidworks and uploaded it to Eiger. I decided to use Onyx material with a few layers of High Strength High Temperature Fiberglass reinforcement. The Onyx is tough and stiff and HSHT is strong, giving the part the characteristics that needed.
I printed the part on a Mark Two Enterprise kit printer. As printed, this frame component is just 26.7 grams. An equivalent metal component would be 115 grams or more. With this part, I know that the build is feasible and am pressing forward with fabrication.
Stay tuned for more updates. In the meantime, follow us on social media to see more reseller applications and other content.
All of the blogs and the information contained within those blogs are copyright by Markforged, Inc. and may not be copied, modified, or adopted in any way without our written permission. Our blogs may contain our service marks or trademarks, as well as of those our affiliates. Your use of our blogs does not constitute any right or license for you to use our service marks or trademarks without our prior permission. Markforged Information provided in our blogs should not be considered professional advice. We are under no obligation to update or revise blogs based on new information, subsequent events, or otherwise.
Never miss an article
Subscribe to get new Markforged content in your inbox
Misc.
What about Carbo-Lift? Carbo-lift created a product that supposedly could be applied to the frame and after a period of time, the paint could be lifted/wiped off. Therefore, leaving the raw carbon fiber and fillers exposed. However, when we wanted to order some, they disappeared. This led us to believe either there isn’t a large enough market for this product or it didn’t really work. Bummer!
Update April 2015: We tried a sample of the Carbo-Lift’s supplier’s product and were not impressed.
Here are the Following Reasons We Don’t Sand to Carbon:
- The labor hours required to sand the frame down to raw carbon safely and cleanly is not cost effective. We like our hands. We sand a lot as it is and while exfoliating your hands is good, this is the wrong kind.
- When manufacturers know carbon is going to be painted over, they do not care as much about where seams and edges are in the carbon. Aesthetically, it can be unattractive. We do not risk it.
- There may be bondo, fillers, off-colored epoxies, and other “stuff” in the carbon before a frame is painted to make it look smooth. If that is uncovered and removed, the carbon isn’t smooth and unsightly. We never risk the integrity of your frame.
- It’s out of our hands, it’s in the manufacturing process.
Of Course, There’s Always Exceptions
Some bikes will have a nicer weave under the paint if it’s near exposed carbon. Depending on the desired custom paint job, select sections of the paint can be sanded away to the exposed carbon. When this is done, you really want a professional doing this or you could really be disappointed. Here’s why: When sanding, you have to be sure not to go into the carbon weave or it will begin to distort and ruin the carbon. As a result, the carbon will look damaged. Also, if you do not remove the paint well enough, the paint will have a tint to where the paint once was.
One of mantras of our company is that every bike leaves our shop better than when it came in. If you have exposed carbon fiber, we can work with it. If you don’t, do not fret or hesitate from contacting us about your dream paint job. That’s what we do day in and day out.
If you really desire a bike that has exposed carbon fiber, Kane Bikes is your company. We love carbon. Unlike the big boys, our carbon frames have an exposed 3k weave surface. Since every bike our customer’s design is a one off paint job, we start with a beautiful foundation.